


Why Type in Hebrew?
Typing in Hebrew is not just about convenience; it’s a vital part of mastering the language. When you type in Hebrew, you reinforce your reading and writing skills, expand your vocabulary, and become more comfortable with the Hebrew alphabet. For students, business professionals, and anyone interested in Israeli culture or travel, being able to type in Hebrew is invaluable.
How to Enable Hebrew Keyboard on Windows
For Windows 10 and Windows 11
- Open the Settings app by pressing Windows + I.
- Go to Time & Language and select Language from the sidebar.
- Click on Add a language.
- In the search box, type Hebrew and select it from the list.
- Click Next, then Install.
- Once installed, you can switch between languages using Alt + Shift or Windows + Spacebar.
After enabling the Hebrew keyboard, you’ll see a language indicator in your taskbar. Click it to switch between your installed languages as needed.
How to Type in Hebrew on Mac
- Open System Settings (or System Preferences on older versions).
- Go to Keyboard and select Input Sources.
- Click the + button to add a new language.
- Scroll down or search for Hebrew and add it.
- Once added, you can switch between keyboards using Control + Spacebar.
Mac will display a flag or language symbol in the menu bar, allowing you to toggle between your input methods easily.
Typing Hebrew on Mobile Devices
Most smartphones and tablets support Hebrew input:
- iOS (iPhone & iPad): Go to Settings > General > Keyboard > Keyboards > Add New Keyboard, then select Hebrew.
- Android: Go to Settings > System > Languages & Input > Virtual Keyboard > Gboard > Languages, then add Hebrew.
Once added, simply switch keyboards using the globe or language icon on your keyboard.
Online Hebrew Keyboards and Tools
If you’re using a shared computer or don’t want to change system settings, online Hebrew keyboards are an excellent solution. Websites like Lexilogos and Gate2Home provide virtual Hebrew keyboards where you can type and copy the text for use elsewhere. Talkpal’s AI platform also supports Hebrew typing and practice exercises directly in your browser.
Tips for Efficient Hebrew Typing
- Familiarize Yourself with the Hebrew Layout: The Hebrew keyboard layout is quite different from the English QWERTY layout. Consider printing a layout guide or using keyboard stickers.
- Practice Touch Typing: Regular practice helps you memorize key positions, increasing your typing speed and accuracy.
- Use Language Learning Apps: Platforms like Talkpal offer typing exercises that reinforce Hebrew vocabulary and spelling.
- Enable On-Screen Keyboard: Both Windows and Mac allow you to display an on-screen keyboard, which can help you learn the Hebrew layout visually.
Common Challenges and Solutions
Many beginners find it challenging to switch between left-to-right (LTR) and right-to-left (RTL) typing. Hebrew is written from right to left, so some applications may require you to set the direction manually. Most word processors and email clients support RTL text; look for a paragraph direction button or setting.
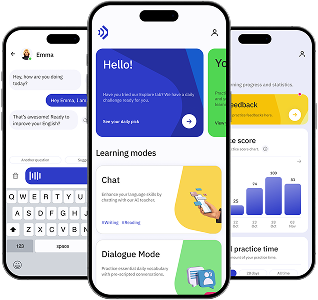
Practice Typing in Hebrew with Talkpal
At Talkpal, we believe that typing is a crucial part of language acquisition. Our AI-powered language learning platform offers interactive typing exercises and real-time feedback, making it easy and enjoyable to practice Hebrew typing. Whether you’re a complete beginner or looking to improve your fluency, Talkpal can accelerate your progress.
Conclusion
Learning how to type in Hebrew on your computer is a valuable skill for students, travelers, and anyone interested in Israeli culture. By enabling the Hebrew keyboard on your device and practicing regularly, you’ll quickly build confidence and proficiency. For more tips, resources, and guided practice, visit Talkpal’s blog and take advantage of our innovative language learning tools.